Friday, July 22, 2011

Brazilian Lemonade

Hello. My name is Anne. And I'm addicted to this drink. I make it all the time. I buy limes in the huge bag from Costco and they're gone within a week. My family is also addicted. Which means they are enabling me. But how we could we survive summer without a refreshing limey beverage? Its not possible. Resistance is futile.

Thanks again Our Best Bites! Another winner!
ps- I copied/pasted directly from their site so the recipe is right out of Kate's mouth.

Ingredients:

4 juicy limes (try and find ones with thin, smooth skins; they’re the juiciest and the thin skin cuts down on the chance of your drink being bitter)
1 c. sugar
6 c. cold water
6 Tbsp. sweetened condensed milk


Directions:


Mix cold water and sugar very well and chill until ready to use. This step can be done ahead of time.


Wash limes thoroughly with soap (I just use hand-dishwashing soap or regular hand soap); you need the soap to get the wax and pesticides off of the limes because you’re using the WHOLE lime, baby. Cut the ends off the limes and then cut each lime into 8ths.


Place 1/2 of the limes in your blender.


Add 1/2 of the sugar water, place the lid on your blender, and pulse 5 times. Place a fine-mesh strainer over a pitcher (the one you’ll serve the lemonade in) and pour the blended mixture through the strainer and into the pitcher. Use a spoon to press the rest of the liquid into the pitcher. Dump the pulp and stuff in the strainer into the trash. Repeat with remaining limes and sugar water. Add sweetened condensed milk; DO NOT leave this step out unless you will die of a horrible sweetened condensed milk allergy because this is the secret ingredient! You may want to taste test it at this point; I used giant, thick-skinned limes tonight and didn’t test it and it came out a little bitter. If it’s bitter, just add some more sugar and maybe a little more milk.
Serve immediately over lots of ice. This does not keep well, so don’t make this in advance (although you can cut the limes, mix the sugar water, and measure the sweetened condensed milk in advance). Serves 4, although I can pretty much guarantee you that people will want more; I usually plan on 1 1/2 servings at LEAST per person.


* a note from Anne, which is actually a tip from my fellow Good Eater, Staci. Don't use the Magic Bullet brand blender. Its too powerful and even if you do it for 5 seconds, its going to pulverize the limes too much and the peel will be too fine to strain out and your drink will taste strongly of lime peel because your drink WILL be lime peel. Long story short: use your regular ol' boring blender, capiche?


**Staci here...editing to add...I actually use a VitaMix and I think it would work fine, but don't blend for more than a second or two. You want the mixture to be VERY chunky. I think the first time I let it go for a good 10 seconds which was WAY too long with the Vitamix.

Wednesday, July 20, 2011

Chocolate Mousse Crunch Cake

If you are in looking for a show stopping dessert, you've met your match. Its got chocolate. And a chocolate moussee. And a toffee obsession. What else is there in life? Thanks for the fab gals @ Our Best Bites for posting! If you don't have their cookbook, stop reading now, run out the door and buy one. You won't regret it! Here's a link to their original recipe.

Ingredients:
1 package Duncan Hines Devil’s Food Cake
1 recipe (more or less) Chocolate Ganache (posted below)
Crushed Heath bars or a bag of chocolate-covered Heath bits
1 tsp. unflavored gelatin
1 Tbsp. cold water
2 Tbsp. boiling water (just heat it in a small bowl in your microwave)
1/2 c. sugar
1/4 c. unsweetened cocoa powder
1 c. whipping cream
1 tsp. vanilla

Directions:
Bake cake according to cake mix instructions in 2 8″ round pans. Allow to cool and set aside. This can be done several days in advance; just freeze the cakes when you’re done.
In a small bowl, combine gelatin and cold water and allow to stand for about 1 minute. While gelatin is softening, bring 2 Tbsp. water to a boil in the microwave. Whisk into the softened gelatin and allow to cool slightly.

In a medium mixing bowl, combine sugar, cocoa powder, whipping cream, and vanilla. Beat with an electric mixer until medium-stiff peaks form. Mix in gelatin mixture and refrigerate for 30 minutes.

Prepare ganache according to directions. With a serrated knife, carefully slice the dome part of each cake layer off so the layers are level. Place one layer on the serving plate and spread about 1/2 of the chocolate mousse over the cake. Sprinkle generously with Heath bits.

Place second layer on top of Heath bits. Again, no skimping allowed.

Spoon ganache over the top layer, allowing it to drip down the sides (because that's what makes it look fancy pants) Sprinkle with additional Heath bits and refrigerate until ready to serve.

Ganache Recipe
8 oz. semi-sweet or dark chocolate
8 oz. heavy cream
Combine chocolate and heavy cream in a microwave-safe bowl. Heat for 2 minutes and stir. Heat for an additional 1-2 minutes or until chocolate is fully melted and can be whisked and incorporated into the cream. Be sure and scrape the sides and bottom to make sure you don’t find any globby bits of chocolate when you start working with it.
The ganache will thicken as it cools, so if it’s a little too thin for you, hang tight and it will be ready pretty quickly. When it’s completely cool, it will be thick and fudgey and can be used like frosting. Store in an airtight container. You can reheat it to achieve your desired consistency.

Saturday, July 16, 2011

Guacamole Salad


Once upon a time there were 2 friends who had a food blog. Then one friend moved away. The other friend who stayed behind missed her and all the cooking adventures they had. Months passed. Then the friend who left, returned! It was only for a short while, but oh how happy the friends were! They ate and cooked and baked and ate some more. (Maybe they ate a little too much.) One night for dinner, this salad was born and the two friends ate in silence. The one friend said, "This is very good." The other friend said, "This is really good." And that was the end of the conversation because they were too busy eating the salad. With bellies full of good food, the 2 friends parted that night thanking the stars above for each other and for the fantastic thing that is guacamole salad. The end.

*inspiration came from this Mel's Kitchen Cafe recipe.
She is a beautiful person for sharing it with the world.

*need a grilled corn tutorial? click here.

Ingredients:
1 pint grape tomatoes, halved
1 yellow bell pepper, seeded and chopped
2 cans (15oz each) black beans, rinsed and drained
1/4- 1/2 cup diced red onion (depends on how much raw onion you like)
3 ears grilled sweet corn, with the kernels removed from the cobs
1-2 cups cooked quinoa, cooled
1 tsp freshly grated lime zest
1/3 cup freshly squeezed lime juice (about 3 limes)
1/4 cup EVOO
1-2 tsp salt
1/2 tsp freshly ground black pepper
1 medium garlic clove, finely minced OR 1 tsp fresh chopped garlic from a jar
a dash (or two or three or seven) of cayenne pepper
3 ripe avocados, seeded, peeled and diced

* a note about measurements before we start with the directions. This recipe serves 6 as a side dish. Or it could also serve 2 ravenously hungry friends who sat down with a bag of tostitos new pepper jack tortilla chips and that was all they had for dinner. First, decide on how many people you are serving. If its on the "more" side, use the bigger measurement. If its on the "less" side, you could tone it down a little and still have lots of salad. You don't want a lot of leftovers because it doesn't keep very well. You know, the avocados turn brown and ruin the prettiness. Its not a "make the day before" salad. Next, adjust to your taste. Don't love corn? leave it out. (really, you don't love corn, what's your deal?) Like more black beans? Throw in another can. This is a starting point really. You can take it and run wild. And try the chips.
Seriously. They were made for this salad.

Directions:
Throw the tomatoes, yellow pepper, black beans, red onion, corn, quinoa and lime zest in a large bowl. In another bowl, whisk the lime juice with the olive oil, salt, pepper, garlic and cayenne pepper and pour over the veggies in the big bowl. Mix 'em up good. Pop in the fridge until you're ready to serve, they can hang out in there for a few hours.

A few minutes before you bring out your salad and wow your guests, get the avocados seeded, peeled and diced and GENTLY fold them into the mixture. Give it a taste test. Or two. Or three. You are the quality control person. Needs another squeeze of fresh lime? Do it now. Needs another dash of salt and pepper? Get 'er done. Then put it on the table and watch it disappear. Every last corn kernel will have vanished. And your guests will be duly impressed. And you will say, "What? I cook like this all the time!" Well done friend, well done.

Tuesday, March 8, 2011

Heath Bar Cake


I have had this recipe printed out for a long time, waiting for the perfect time to make it. That window of opportunity nicely presented itself last week. This was a delightful cake, simply delightful. So moist and toffee-esque. Might have made that word up, go with me here. Here's the link to the original recipe over at Mel's Kitchen Cafe. If you don't follow her blog on google reader or facebook, you totally should. Good stuff, people, good stuff.

Ingredients:
1 cup packed light brown sugar
1/2 cup granulated sugar
2 cups flour
8 tablespoons (1 stick) butter, softened
1 cup buttermilk
1 large egg
1 teaspoon vanilla
1 teaspoon baking soda
1/2 teaspoon salt
5-6 (1.4 ounces each) chocolate covered toffee bars (like Heath), chopped

Directions:

Preheat the oven to 350 degrees and center a rack in the middle of the oven. Lightly grease a 9X13-inch pan and set aside.

In a large bowl, combine the brown sugar, white sugar, flour and butter. Crumble these ingredients together with a pastry blender, whisk or two forks until the mixture is crumbly and coarse. Remove 1/2 cup of the crumbs to a small bowl and set aside. To the large bowl with the remaining crumbs, add the buttermilk, egg, vanilla, baking soda and salt. Mix well.

Pour the batter into the prepared pan, smoothing it to the edges. Sprinkle the top of the cake with the reserved crumbs and chopped Heath bars. Bake for 25-30 minutes until the center is no longer gooey but a toothpick inserted comes out with moist crumbs. The cake may fall slightly in the center leaving the edges raised. No fear! It will still be delicious.


*a note. I was in a state of frenzy when I was half way through making this cake because I realized that I forget to buy heath bars to crush up! Did I despair? Well, maybe for 5 seconds. Then, I grabbed my bag of skor bits and 1 8oz hershey's chocolate bar and went to town on the crumble. Mmmm, yum.

Monday, March 7, 2011

White chocolate walnut blondies with maple cream sauce

You know that yummy, spectacular dessert that Applebee's has? The one that's served hot with the cookie bar, ice cream and sinfully delicious sauce? You know that one? The one that I would drive all the way to Applebees and not order dinner, just this dessert? Yep, that's the one. Well, thanks to A Hint of Honey, I have found the best knock-off. Ever. Period. The end.
Two things, #1- really splurge and buy the pure maple syrup. suck up the price tag, its worth it. #2- Serve with a really fantastically creamy vanilla ice cream. Make your own or buy a quality brand. It makes or break this. Okay, enough soapboxing from me. Enjoy!

INGREDIENTS
Blondies:
3 cups all-purpose flour
1/4 tsp. salt
1 tsp. baking powder
10 Tbsp. unsalted butter, melted
2 cups light brown sugar
3 eggs, lightly beaten
1 tsp. pure vanilla extract
1/2 cup walnuts, chopped
1 cup white chocolate chips

Maple Cream Sauce:
2 Tbsp. unsalted butter
1/2 cup pure maple syrup (keep your Mrs. Butterworth's outta here!)
1 1/2 cups heavy cream


DIRECTIONS
1. Preheat oven to 350 F. Lightly grease a 9x13 baking pan.

2. In a medium bowl, whisk to combine the flour, salt, and baking powder. In a separate large bowl, whisk to combine the melted butter and brown sugar until well-blended. Stir in the eggs and vanilla, mixing well. Slowly add the flour mixture to the wet ingredients, until moist throughout (be careful not to overmix). Stir in the walnuts and white chocolate chips. (The batter will be very thick.)

3. Pour batter into the prepared baking dish and baked in preheated oven for 20-25 minutes, until a toothpick inserted into the center comes out clean. Cool slightly before serving.

4. To prepare the maple cream sauce, melt butter in a medium saucepan over medium heat. Add the maple syrup and heavy cream and bring to a simmer. Reduce heat slightly and simmer for about 30 minutes, until thickened and reduced by 1/3. Let cool slightly before serving. (Or refrigerate and reheat prior to serving.)

5. Place a scoop of vanilla ice cream over top of a warm blondie. Drizzle with warm maple cream sauce, sprinkle with toasted walnuts and serve.

Serves 12.

Sunday, March 6, 2011

Steak Fajitas


Have you checked out Our Best Bites? I have been missing out! So many yummy things, so many fun things, so many cool things like a new cookbook and blog make-over. Anyway, found this fantastic recipe and after making it, my husband said it needs to be moved into the "keeper pile." So there you have it. Its a keeper. Fo' sure. I have posted my photo and copied/pasted their exact words. We used 1 lb of skirt steak and my family (2 adults and 3 kids) devoured it, so I am absolutely doubling this next time. We cooked them on the grill, meat directly on the grill racks, veggies in a metal grill basket. Squeeze some fresh lime juice on the meat before you serve it and that really adds the finishing touch. Make this tonight!

Measurements of meat and vegetables are approximate. Adjust depending on your preference and the number of people you're serving. This will serve about 4-6.

1 lb boneless skinless chicken breasts, chicken thighs, or steak
2-3 bell peppers, stem and membranes removed and peppers quartered
1 large onion (any color/variety) sliced into 1/2" slices

Marinade:
1/4 C fresh lime juice
1/3 C water
2 T vegetable oil
2 cloves garlic, pressed or finely minced
3 t vinegar
2 t soy sauce
1-2 t liquid smoke
1 t salt
1/2 t chili powder, or chipotle chili powder
1/2 t cayenne pepper
1/4 t ground black pepper
1/4 t onion powder

*If you're not familiar with liquid smoke, you can find it near the bbq sauces. Don't make this without it! It's definitely one of the key components. It makes things yummy and smoky and super flavorful. And if you're wondering, it actually is real smoke in liquid form. Interesting, eh?

Place meat in a zip-top bag or shallow dish. Place vegetables in another. In a medium bowl, combine all marinade ingredients and whisk well. Reserve 3-4 Tablespoons of marinade for later use. With remaining marinade, add a splash to the vegetables (enough for a light coating) and the remaining to the meat. Marinate for 4-6 hours and up to overnight.

Preheat bbq grill (my preference), indoor grill pan, or large skillet. If you're using a grill, place everything on at the same time. If using a skillet, slice peppers and onions first. Cook chicken for a few minutes on each side until cooked through and remove from pan. Cover with foil to keep warm. Add vegetables and cook until crisp tender.

Remove vegetables from cooking surface and slice. Slice meat. Toss with reserved marinade and serve.

Saturday, March 5, 2011

Pecan Bars


Every time I look at the name of these bars, I have a little voice in my head that says, " Pecan" in the twangest southern drawl ever. I obviously have issues. But moving on, lets talk about these, shall we? Shortbread base- a thousand times yes. Gooey caramel made with real cream- you know it baby. And finally, these bad boys are loaded with nuts, the good kind not the creepy kind. Sooo glad Staci wanted to make these. Good call mi amiga!
Thanks Martha Stewart Cookie Book!

Ingredients:

for the crust-
1 cup plus 2 tbsp unsalted butter (2 1/4 sticks), softened
3/4 cup packed light brown sugar
1/2 tsp salt
3 cups all purpose flour

for the filling-
1/2 cup butter
1/2 cup packed light brown sugar
1/4 cup plus 2 tbsp honey
2 tbsp white sugar
2 tbsp heavy cream
1/4 tsp salt
2 cups (8oz) pecan halves
1/2 tsp pure vanilla extract

Directions:
1. Preheat oven to 375. Make crust: Put butter and brown sugar into bowl of electric mixer fitted with the paddle attachment; mix on medium speed until light and fluffy, about 2 minutes. Mix in salt. Add flour, 1 cup at a time, mixing until fully incorporated after addition. Continue mixing until dough begins to come together in large clumps.

2. Press dough about 1/4 inch thick into a 9x13 pan. Pierce the dough with a fork. Chill until firm, about 20 minutes. Bake until golden brown, 18-20 minutes. Transfer to a wire rack to cool completely. Reduce oven to 325.

3. Make filling: Place butter, brown sugar, honey, white sugar, and heavy cream in a saucepan over high heat. Bring to a boil, stirring constantly until mixture coats the back of a spoon, about 1 minute. Remove pan from heat; stir in salt, nuts and vanilla. Pour filling into the cooled crust.

4. Bake until filling bubbles, 15-20 minutes. Carefully transfer to a wire rack to cool completely. Run a paring knife around edges of the pan and invert onto cooling rack. Invert again on a cutting board. Use a sharp knife to cut into 1 by 3 inch bars. Bars can be stored in an airtight container at room temperature up to 1 week.

* a note. I didn't invert my pan onto a cutting board. I'm low class I guess, we just cut them out of the pan when we served them.

Wednesday, February 23, 2011

Bran Muffin


Every once in a great while I think, maybe I shouldn't post all desserts.(don't worry, this doesn't happen too often.) Maybe I should post something that semi resembles health food. Cue today's post. Here's a tasty little bran muffin that doesn't weigh 10 lbs or have the density of a boulder. Sure, it has white flour and white sugar, but I'm feeling pretty good about that cup and a half of bran cereal. Aren't the experts always saying we need more fiber? Well, I'm happy to oblige. This comes from my "Just a matter of Thyme" cookbook.

Ingredients:
1 1/4 cups all purpose, unbleached flour
1/4 tsp salt
1 tbsp baking powder
1/2 cup sugar
1 1/2 cups bran cereal
1 1/4 cups milk (I used 1%)
1 egg, beaten
1/4 cup vegetable oil (I used canola)

Directions:
Preheat oven to 400. Prepare a 12 cup muffin tin. Combine cereal and milk in a large bowl and let stand for 2 minutes. Combine dry ingredients in a separate bowl. Add egg and oil to cereal mixture and beat well. Add dry ingredients all at once, stirring only until combined. Spoon into prepared muffin tin and bake for 15-17 minutes or until very lightly browned. Makes 1 dozen. This batter may be refrigerated for up to 2 weeks before baking.

Wednesday, February 16, 2011

are you out there??

Big news. Staci is coming back!! At the end of summer, she and her little family packed up and moved away from me, clear across the country. Some mumbo jumbo about furthering her husband's education, bettering their family, blah blah blah. Anywho, she is coming back for a visit! We have lots of fun things planned, namely involving food, because hello, that is who we are. Now, this poor blog has not had a lot of attention and we think its high time that changed. Next week we are doing a blog make-over and trying new recipes and taking kick-a photos. So to the loyal followers of this blog (Hi mom) I pose a question: what do you want to see more of? main dishes? desserts? snacks? kid friendly stuff? gourmet stuff? cupcakes, lots more cupcakes? If your answer included the words "low calorie" or "carb free" this might not be the blog for you, just sayin'. But for everyone else, stay tuned because Staci and I are cooking up a storm of good eats!

Tuesday, January 25, 2011

Cashew Caramel Cookies

My BFF and fellow Good Eats bloggerista (just made the word up, go with it) Staci gave me a wonderful Christmas present. A Martha Stewart Cookie Cookbook. This was the first recipe I tried, they practically begged me to make them. These were FANTASTIC! Shout it from the rooftops baby! Mmmmm, love cashews. Mmmm, love caramel. Put them together and throw in a tasty cookie and you've got heaven in your hand. Now, to be fair, I need to confess something. This is the part where I tell you I *didn't* actually make the caramel sauce from the recipe but instead I used a jar of Mrs. Richardsons in my fridge. This is the part where instead of judging me, you say, "Oh Anne! You were in a time crunch and of course we still love you!" Thanks guys, you're the best! Glad we sorted that out.

Makes about 3 dozen

  • 1 2/3 cups all-purpose flour
  • 1/2 teaspoon salt
  • 2 1/2 cups roasted salted cashews
  • 2 tablespoons plus 1 teaspoon canola oil
  • 1 stick (8 tablespoons) unsalted butter, softened
  • 3/4 cup packed light-brown sugar
  • 1/2 cup granulated sugar
  • 1 large egg
  • 1 teaspoon pure vanilla extract
  • 24 cubes soft caramel candy (7 ounces)
  • 1/4 cup heavy cream

Directions

  1. Preheat oven to 350 degrees. Sift flour and salt together. Coarsely chop 1 cup cashews; set aside. Process remaining 1 1/2 cups cashews in a food processor until finely chopped. Pour in oil. Process until mixture is creamy, about 2 minutes.
  2. Put cashew mixture, butter, and sugars in the bowl of an electric mixer fitted with the paddle attachment; mix on medium speed until fluffy, about 2 minutes. Mix in egg and vanilla. Reduce speed to low; gradually add flour mixture. Mix in reserved chopped cashews.
  3. Shape dough into 1 1/2-inch balls; space 2 inches apart on 2 parchment-lined baking sheets. Bake 6 minutes; gently flatten with a spatula. Bake until bottoms are just golden, 6 to 7 minutes more. Let cool completely on sheets on wire racks.
  4. Melt caramels with cream in a small saucepan over low heat, stirring. Let cool. Using a spoon, drizzle caramel over cookies; let set. Store airtight in single layers.


Read more at Marthastewart.com: Cashew-Caramel Cookies - Martha Stewart Recipes

Wednesday, December 29, 2010

Almond Joy Balls


From Paula Deen via my mother-in-law to me and now to you. These were the jewels in the holiday goodie plate crown. A delectable combination of sugar, butter, coconut and chocolate. I'm posting the recipe in its original form but here's what I did differently: 1) ran out of almond extract and subbed amaretto flavoring instead, mmmm, good. 2) used slightly less powdered sugar as per my mother-in-law's recommendation. 3) tried rolling into balls and that was a mess. maybe I should have sprayed PAM on my hands?? I was in a huge time crunch so I used my cookie scoop instead. 4) I didn't dip them in chocolate because they weren't in true balls, more of a semi-ball, if you will. So I melted the chocolate and drizzled on top. Guess what? They still tasted amazing! And I quite liked the drizzled chocolate presentation. I'd love to hear how these turn out for you and if you decide to dip or drizzle. enjoy!

Almond Joy Balls

Ingredients

  • 2 (16-ounce) boxes confectioners' sugar
  • 1/2 cup (1 stick) butter, softened
  • 1 (14-ounce) can sweetened condensed milk
  • 1 teaspoon pure almond extract
  • 1 (14-ounce) package shredded coconut
  • 1 1/2 cups chopped nuts
  • 1 (12-ounce) package chocolate chips

Directions

Cream together sugar and butter in a bowl; add milk. Stir in almond extract, coconut, and nuts; mix well. Form candy into 1-inch balls. Place on waxed paper and refrigerate at least 3 hours. Melt chocolate in top of double boiler, stirring well. Remove from heat but allow chocolate to remain over hot water. (If chocolate becomes too thick, return to heat for a minute or so to thin). With a toothpick, dip each ball in chocolate and place on waxed paper until set.

Saturday, December 18, 2010

Peppermint Bark

I've been making this delightful Christmasy treat since December 2005 when it first appeared in Everyday Food. I love it. My kids love it. I love putting it on our goodie plates. I love putting some in a little airtight container and mailing it friends. Its easy, oh so very easy. Which is all the better, because lets face it, who has time to make labor intense treats this time of year? Exactly. Enjoy this crunchy treat!

Makes 36 pieces

  • Nonstick cooking spray
  • 1 pound white chocolate, chopped (do not use chips)
  • 2 cups puffed rice cereal
  • 1 bag (7.5 ounces) hard peppermint candies, unwrapped

Directions

  1. Spray a 10-by-15-inch rimmed baking sheet with nonstick cooking spray; line with a piece of waxed paper. Crush candies (see note below).
  2. Place white chocolate in a heatproof bowl set over (not in) a saucepan of simmering water. Heat, stirring occasionally, until smooth, 4 to 6 minutes. Remove from heat; stir in rice cereal.
  3. Transfer mixture to prepared pan; with a spatula, spread to edges of pan.
  4. Sprinkle with crushed candy; with a piece of waxed paper covering the entire surface, press in gently (paper prevents hands from sticking to candy and chocolate). Chill until firm, 20 to 30 minutes (no longer, as candy will begin to soften).
  5. Peel waxed paper off. Break bark into 2-inch pieces. Store at room temperature in an airtight container, up to 1 week.


Friday, December 17, 2010

Gingerbread White Chocolate Blondies

These are the most Christmasy blondies you will ever meet. And you'll be so glad that you did, in fact, have the opportunity to meet. Because they will change your Christmas. Last year, I made 6 pans in a 2 week period. No joke. They are now a permanent staple on my neighborhood goodie plate. And they've made appearances at a church function, school party and potluck, and each time, I've been begged for the recipe. Again, no joke. Thanks to the genius Mel for sharing this lovely holiday concoction.


Ingredients:

2 ¾ cups plus 2 tablespoons all-purpose flour
1 ¼ teaspoons baking soda
1 ¼ teaspoons salt
1 ¼ teaspoons ground cinnamon
1 teaspoon ground ginger
¼ teaspoon ground cloves
1 ¼ cups (2 ½ sticks) butter, room temperature
1 ¼ cups packed light brown sugar
½ cup plus 2 tablespoons granulated sugar
2 large eggs plus 1 egg yolk
1 ¼ teaspoons pure vanilla extract
1/3 cup unsulfured molasses
1 ¾ cups white chocolate chips (I used a whole bag)
Nonstick cooking spray

Directions:

Preheat oven to 350 degrees F. Prepare a 13x9 baking dish with cooking spray and set aside (I lined my pan with aluminum foil and then sprayed the aluminum foil with cooking spray).

Whisk together flour, soda, salt, and spices in a bowl.

In the bowl of an electric mixer fitted with the paddle attachment (or with a hand mixer), beat butter and sugars on medium-high speed until creamy and pale, about 3 minutes. Add eggs and yolk one at a time, scraping down sides of bowl as needed. Add vanilla and molasses and mix on medium speed until combined.

Add flour mixture on low speed until combined. Stir in white chocolate.

Spread batter evenly into prepared pan and bake until golden around edges and toothpick comes out clean, about 25 minutes. Let cool completely in pan; cut into 24 squares. Blondies can be stored in airtight containers at room temperature up to 1 week.

*makes about 24 blondies, depending on big you cut them. They do sink a little after they've cooled, TOTALLY NORMAL. As per Mel's suggestion, cut off the jaggedy edges that are higher than the center, save those for your kids and husband, and then cut the rest into uniform squares to serve. voila!

Wednesday, December 8, 2010

Dixie Salad


My daughter recently has expressed her undying love for all things pomegranates. Since I am happy when they are happy eating fresh fruits and vegetables, I had to make this salad. And it has homemade whipped cream in it. Which makes me very happy. So really, its a win/win for everyone. Thanks to my lovely Mary Ann for sharing this with me!


The sauce: (yes, this is a salad but it starts with a sauce, just trust me!)

In a small bowl combine;

2 tbsp cornstarch

1/4 cup water

1 1/2 tbsp lemon juice


Pour this mixture into a medium saucepan and add:

20 oz can crushed pineapple, DO NOT DRAIN

1/4 cup sugar

Mix all ingredients together and stir over medium heat until thick and bubbly.

Let cool completely!


In a large bowl combine:

2 apples, peeled and cut into bite size pieces
2-3 bananas, sliced
1/2 cup chopped pecans
1 1/2- 2 cup pomegranates
1 cup whipping cream (whipped) with 1/4 cup powdered sugar & 1 tsp. vanilla
1-2 cup mini marshmellows


Add the cooled pineapple mixture to the bowl with chopped fruit. Fold everything together. Keep chilled in fridge until ready to serve. And like all things made with fresh fruit and whipped cream, its best to eat it all the day you serve it or else it gets mushy. Read: spoon heaping mounds onto your plate because you don't want leftovers and because its deliciouso!

Tuesday, December 7, 2010

Caramel-Pecan Apple Pie


Doesn't the title alone grab you? Doesn't need much by way of introduction I'll tell ya that much! This comes from my good friend Heidi Dahl who kindly shared some with me a few Thanksgivings ago when she learned I wasn't making any pie that day. (Our family actually celebrated Thanksgiving earlier in the month with family up in Idaho so don't think we're anti-turkey day!) Anyway, there's some caramel and some apples and then some pecans and more caramel. Happy Holidays to me!

Original recipe from Taste of Home Oct/Nov 2007, adapted slightly by Heidi

Ingredients:
7 cups sliced peeled tart apples
1 tsp lemon juice
1 tsp vanilla
1/3 cup brown sugar
3 tbsp sugar
2 1/2 tsp cinnamon
2 tbsp corn starch
1/4 cup caramel ice cream topping, room temperature (I used Mrs. Richardsons)
1 unbaked pastry shell, 9 inches
3 tbsp butter, melted

Streusel topping:
3/4 cup all purpose flour
2/3 cup chopped pecans
1/4 cup sugar
6 tbsp cold butter
1/4 cup caramel ice cream topping, room temperature

Directions:
In a large bowl, toss apples with lemon juice and vanilla. Combine sugars, cinnamon and cornstarch; add to apple mixture and toss to coat. Pour caramel topping over bottom of unbaked pastry shell; top with apple mixture. This will be a heaping mound of apple goodness, don't be alarmed! Drizzle with melted butter.

In a small bowl, combine the flour, pecans and sugar. Cut in butter until mixture resembles coarse crumbs. Sprinkle over filling. Bake at 350 for 55-65 minutes or until filling is bubbly and topping is browned. Immediately remove from oven and drizzle with caramel topping. Cool on wire rack. Serves 8.

*a note. I served this in the evening on Thanksgiving day so I made the pie early in the morning. It sat on my counter all day, don't refrigerate it. So its not a traditional "hot apple pie serve with ice cream" type deal.

Tuesday, November 9, 2010

Orange Chicken

Last week my daughter said something really hurtful. She told me that school lunch was better than sack lunch. Ouch. I asked why. She said that the orange chicken she had for lunch that day was way better than a ham and cheese sandwich. I totally agree that *really good* orange chicken is "way better" than a ham and cheese sandwich. But still . . . cafeteria food had my child singing praises? I had to do something and quick! Allrecipes.com to the rescue! Tons of rave reviews? check. Ingredients I already have? check. End result super yummy AND everyone agreed that it is way better than the stuff the school passes off as orange chicken? check. I am pretty much a cooking rock star now in the eyes of a 6 year old. Make this and be the hero of the day in your house too!

here's the link to the original recipe off Allrecipes.com.

Ingredients

  • Sauce:
  • 1 1/2 cups water
  • 2 tablespoons orange juice
  • 1/4 cup lemon juice
  • 1/3 cup rice vinegar
  • 2 1/2 tablespoons soy sauce
  • 1 tablespoon grated orange zest
  • 1 cup packed brown sugar
  • 1/2 teaspoon minced fresh ginger root
  • 1/2 teaspoon minced garlic
  • 2 tablespoons chopped green onion
  • 1/4 teaspoon red pepper flakes

  • 3 tablespoons cornstarch
  • 2 tablespoons water

  • Chicken:
  • 2 boneless, skinless chicken breasts, cut into 1/2 inch pieces
  • 1 cup all-purpose flour
  • 1/4 teaspoon salt
  • 1/4 teaspoon pepper
  • 3 tablespoons olive oil

Directions

  1. Pour 1 1/2 cups water, orange juice, lemon juice, rice vinegar, and soy sauce into a saucepan and set over medium-high heat. Stir in the orange zest, brown sugar, ginger, garlic, chopped onion, and red pepper flakes. Bring to a boil. Remove from heat, and cool 10 to 15 minutes.
  2. Place the chicken pieces into a resealable plastic bag. When contents of saucepan have cooled, pour 1 cup of sauce into bag. Reserve the remaining sauce. Seal the bag, and refrigerate at least 2 hours.
  3. In another resealable plastic bag, mix the flour, salt, and pepper. Add the marinated chicken pieces, seal the bag, and shake to coat.
  4. Heat the olive oil in a large skillet over medium heat. Place chicken into the skillet, and brown on both sides. Drain on a plate lined with paper towels, and cover with aluminum foil.
  5. Wipe out the skillet, and add the sauce. Bring to a boil over medium-high heat. Mix together the cornstarch and 2 tablespoons water; stir into the sauce. Add pepper flakes. Reduce heat to medium low, add the chicken pieces, and simmer, about 5 minutes, stirring occasionally.
* my notes.
#1- Don't like the time consuming (and icky) task of cutting raw chicken into bite sized pieces? Me neither. Which is why I kindly asked the meat counter to do it when I purchased the chicken. Score for me.
#2- Lets talk spicy. If you want MUCHO spicy, add 1 tsp of red pepper flakes to the chicken marinade and add another 1 tsp to the orange sauce at the end (step 5 in the instructions.) If you want semi-spicy, just add anywhere from 1/4 - 1 tsp of the flakes just to the sauce. And if you want a very mild, sweet orangey chicken, omit the flakes all together. I like to add about 1/2 tsp flakes to the sauce at the end. My kids like it better that way.

Thursday, September 16, 2010

Peanut Butter Bars


Who has too many recipes for treats? Who, I ask? No one, that's who. We always need another one and so here's one for today. It comes from my good friend Christy Miller. She's always cooking up something yummy! And I love how all the ingredients I already had in my pantry, nothing fancy to go buy. That means the time from getting the recipe to making the treat was dramatically reduced. Score.

Ingredients:
12 whole graham crackers, crushed
1 cup butter, softened
1 cup smooth peanut butter
3 1/2 cups powdered sugar
1 (12oz) chocolate chips (I prefer milk chocolate)

Directions:
Combine graham crackers, butter, peanut butter and powdered sugar in a large bowl. Pat firmly into a greased 9x13 pan. Melt chocolate chips until smooth when stirred. Frost the patted down mixture with the melted chocolate. Refrigerate for several hours. When chilled, cut into small squares, they are rich!!

Tuesday, September 14, 2010

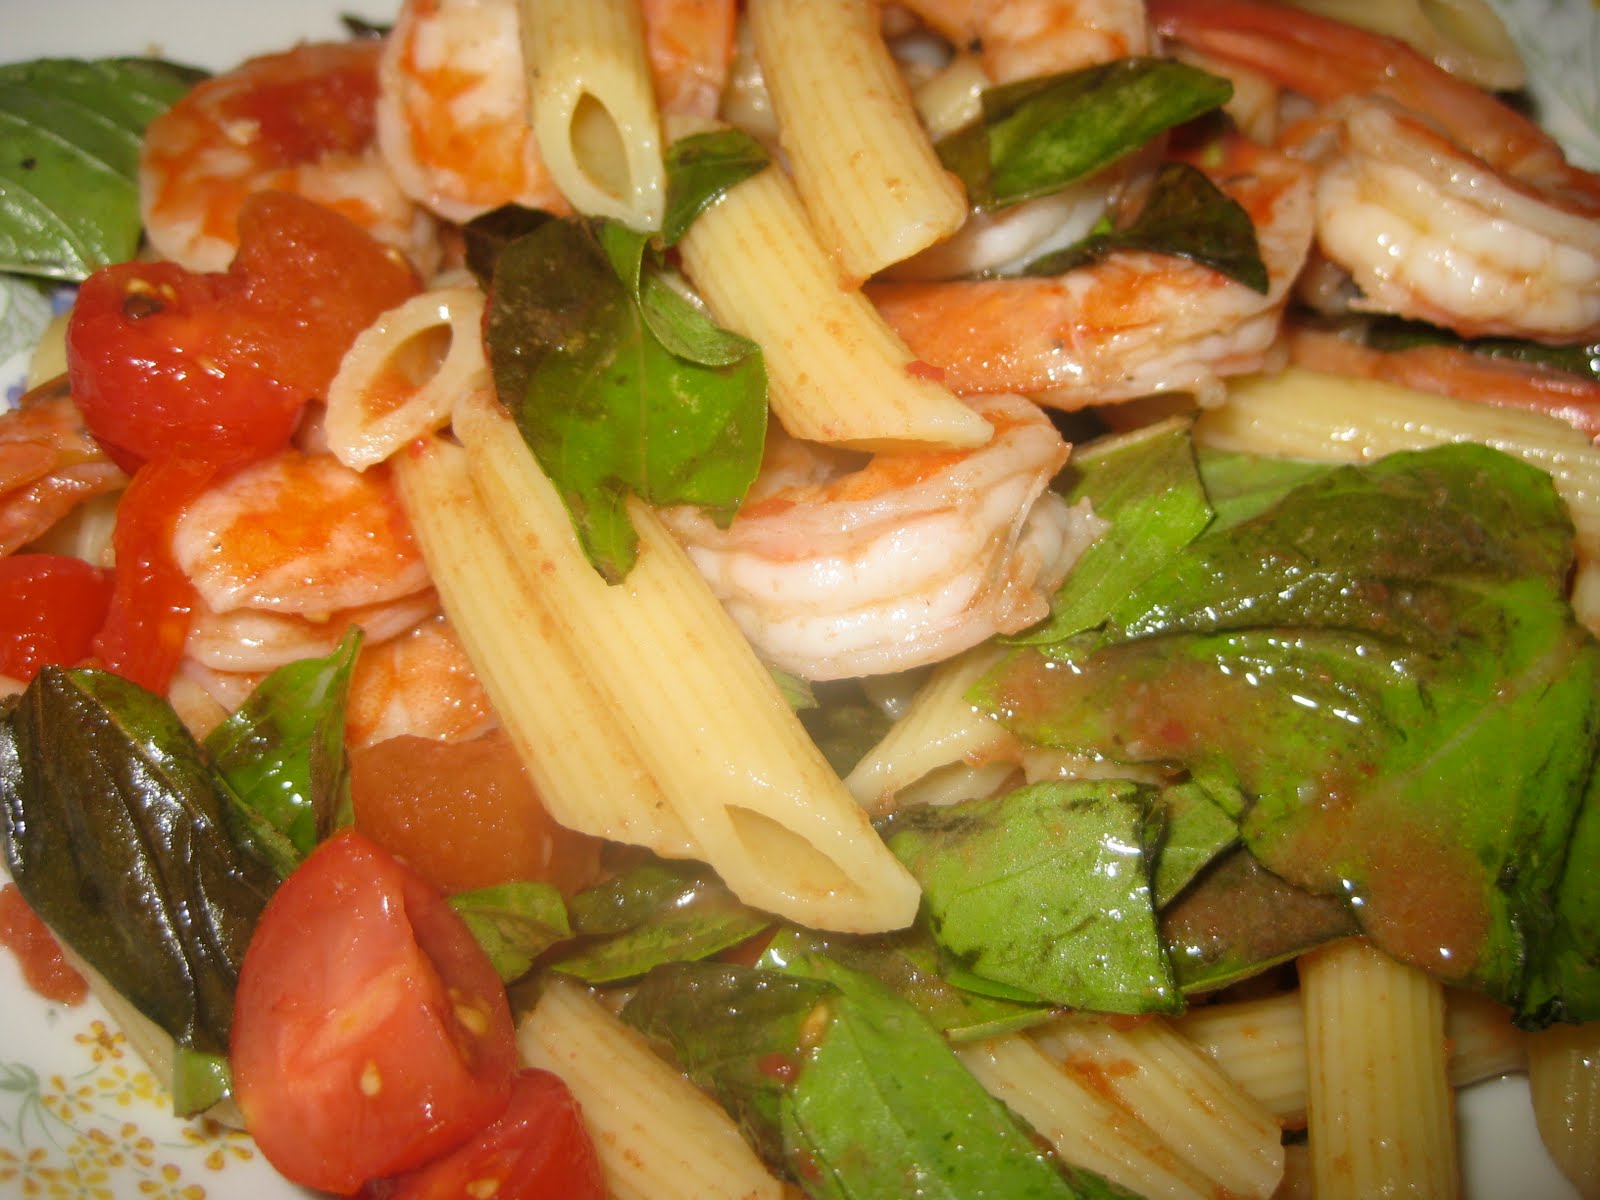
Shrimp, Tomato, Basil Pasta

I have loved this recipe for several years. Its fresh, fresh, fresh! And have I mentioned my love affair with basil? If not, let me mention it now. I have a love affair with basil. My husband and kids, not so much. But really, that is A-Ok with me. Because more for me. How's that for sharing, loving and giving? Ha! And shrimp, shall we talk about shrimp? So very, very tasty. Now the tomatoes are going to feel left out so here's a little diddy about them: they are the perfect addition to this meal. Can you imagine this dish without tomatoes? Me neither. Without further ado, I give you dinner tonight!

this recipe comes from Everyday Foods magazine, June 2006

Serves 4

  • 1 1/2 pounds medium shrimp, peeled and deveined (tails removed)
  • Coarse salt and ground pepper
  • 6 teaspoons olive oil
  • 2 garlic cloves, minced
  • 1 can (14 1/2 ounces) diced tomatoes in juice
  • 1 pint cherry or grape tomatoes, halved
  • 1/2 pound linguine
  • 1 1/2 cups lightly packed fresh basil leaves, torn into small pieces, plus extra leaves for garnish (optional)

Directions

  1. Season shrimp with salt and pepper. In a large skillet, heat 4 teaspoons oil over high. Add shrimp; cook until opaque throughout, turning occasionally, 3 minutes. Transfer to a bowl; set aside.
  2. Make sauce: To the same skillet, add remaining 2 teaspoons oil and garlic; cook over medium heat until fragrant, about 30 seconds. Add canned tomatoes and their juice, along with 2 cups water; bring to a boil. Reduce heat; simmer, stirring occasionally, until tomatoes have softened and are saucy, about 15 minutes. Remove sauce from heat; stir in cherry tomatoes.
  3. Meanwhile, in a large pot of boiling salted water, cook pasta until al dente, according to package instructions. Drain; return pasta to pot. Add tomato sauce, shrimp, and basil; season with salt and pepper, and toss. Serve immediately, garnished with basil leaves, if desired.


Saturday, August 28, 2010

Fruit salsa with Cinnamon/sugar chips


When an Allrecipes.com recipe has like a bazillion positive reviews, there might be some truth there my fellow chefs. As in, you should make that recipe ASAP its that good. Over 2500 reviewers can't be wrong! Here's the link. Plus, it has my name in the recipe title. It was fate I tell you! All the book club ladies enjoyed this immensely. I.will.make.this.again.soon.

ps- no changes, I didn't sub any different fruit, made it exactly as laid out here. I used the costco cook yourself tortillas, made the tortillas and then followed with the cooking spray, etc.
Ingredients:
2 kiwis, peeled and diced
2 Golden Delicious apples - peeled, cored
and diced
8 ounces raspberries
1 pound strawberries
2 tablespoons white sugar
1 tablespoon brown sugar
3 tablespoons fruit preserves, any flavor
10 (10 inch) flour tortillas
butter flavored cooking spray
2 cups cinnamon sugar


Directions:
1. In a large bowl, thoroughly mix kiwis, Golden Delicious apples, raspberries, strawberries, white sugar, brown sugar and fruit preserves. Cover and chill in the refrigerator at least 15 minutes.
2. Preheat oven to 350 degrees F (175 degrees C).
3. Coat one side of each flour tortilla with butter flavored cooking spray. Cut into wedges and arrange in a single layer on a large baking sheet. Sprinkle wedges with desired amount of cinnamon sugar. Spray again with cooking spray.
4. Bake in the preheated oven 8 to 10 minutes. Repeat with any remaining tortilla wedges. Allow to cool approximately 15 minutes. Serve with chilled fruit mixture.

Friday, August 27, 2010

Oreo No Bake Cheesecake

The song "Isn't she lovely?" is playing in my head while I look at this photo. It was a magnificent combination of chocolate and pudding and swirly oreo goodness. I really liked what Melanie at Mel's Kitchen Cafe had to say about breaking it down into simple steps. Totally true! It is not, I repeat, NOT overwhelming when you take it one piece at a time. Plan ahead. You can do this. Not only will your guests be wowed but your husband might mention something about you being the best wife ever in between mouthfuls. I'm just saying . . .

from here down is a direct copy/paste from Melanie's post.
See I'm giving credit where credit is due!

*Note: this recipe has several steps but the good news is that they can be done in stages. The crust can be made up to 2 days in advance, as well as the cheesecake filling. The entire cheesecake can be wrapped in plastic and refrigerated for up to 3 days.


*Serves 12

Cookie Crust:
30 Oreo cookies, broken into rough pieces
7 tablespoons butter, softened


Cheesecake Filling:

1 cup whole milk
4 large egg yolks
1/4 cup all-purpose flour
8 ounces white chocolate, chopped, or 1 1/2 cups white chocolate chips
2 pounds (4 bars) cream cheese, softened to room temperature
1/2 cup powdered sugar
2 teaspoons vanilla extract
1/8 teaspoon salt
12 Oreo cookies, broken into rough pieces

For the cookie crust, place the cookies and the butter in a food processor and process until finely ground (alternately, you could use an electric mixer to combine the butter and cookies). Press the crumb mixture evenly over the bottom and partway up the sides of a 9-inch springform pan. Refrigerate until the crust has hardened and is set, at least 1 hour or up to 2 days.

For the cheesecake filling, heat 3/4 cup of the whole milk in a medium saucepan over medium heat until the milk comes to a simmer. Meanwhile, whisk the egg yolks, flour and remaining 1/4 cup milk in a large bowl until the mixture is smooth. Slowly whisk the hot milk into the yolk mixture, whisking constantly to avoid scrambling the eggs. Return the mixture to the saucepan and cook over medium heat, whisking constantly, until the mixture is very thick and glossy, about 1 to 2 minutes. Take the pan off the heat and whisk in the white chocolate until it is completely melted.

Transfer the pudding to a bowl and press plastic wrap directly on the surface. Refrigerate the pudding until it is cold and set, at least 1 hour or up to 2 days.

After the pudding has chilled, with an electric mixer on medium-high, beat the cream cheese, sugar, vanilla and salt until light and fluffy, about 2 minutes. Reduce the speed to medium-low and mix in the chilled pudding just until it is combined, about 30 seconds. Pour 1/3 of the cream cheese mixture evenly over the chilled crust. Sprinkle 1/2 of the cookies over the surface. Again, pour 1/3 of the cream cheese mixture over the crust and sprinkle the remaining cookies over the top. Top with the remaining filling and smooth the cream cheese mixture evenly over the top of the cheesecake. Refrigerate until set, at least 6 hours. Remove the sides of the pan, cut into slices and serve. The cheesecake can be covered in plastic wrap and refrigerated for up to 3 days.

Recipe Source: adapted from Cook’s country June/July 2008